To request a custom panel, begin by providing the required sample information. This information determines the type of request you are making (standard vs. advanced workflow) and informs panel design considerations.
| Workflow | Key information |
|---|---|
| Standard workflow | The standard workflow is prompted by selecting human or mouse for species and standard genes for target type. |
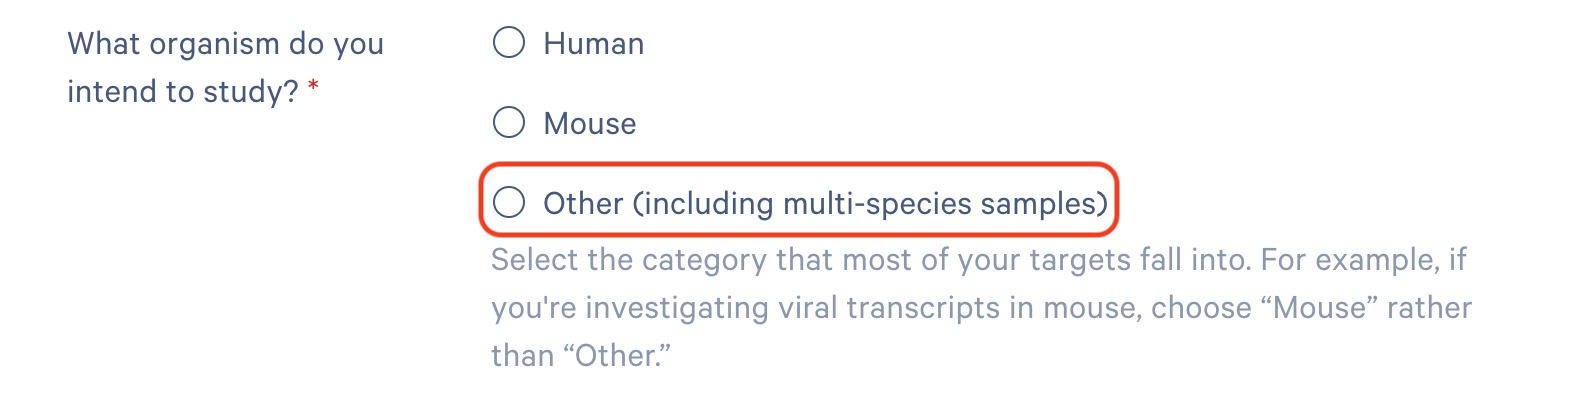
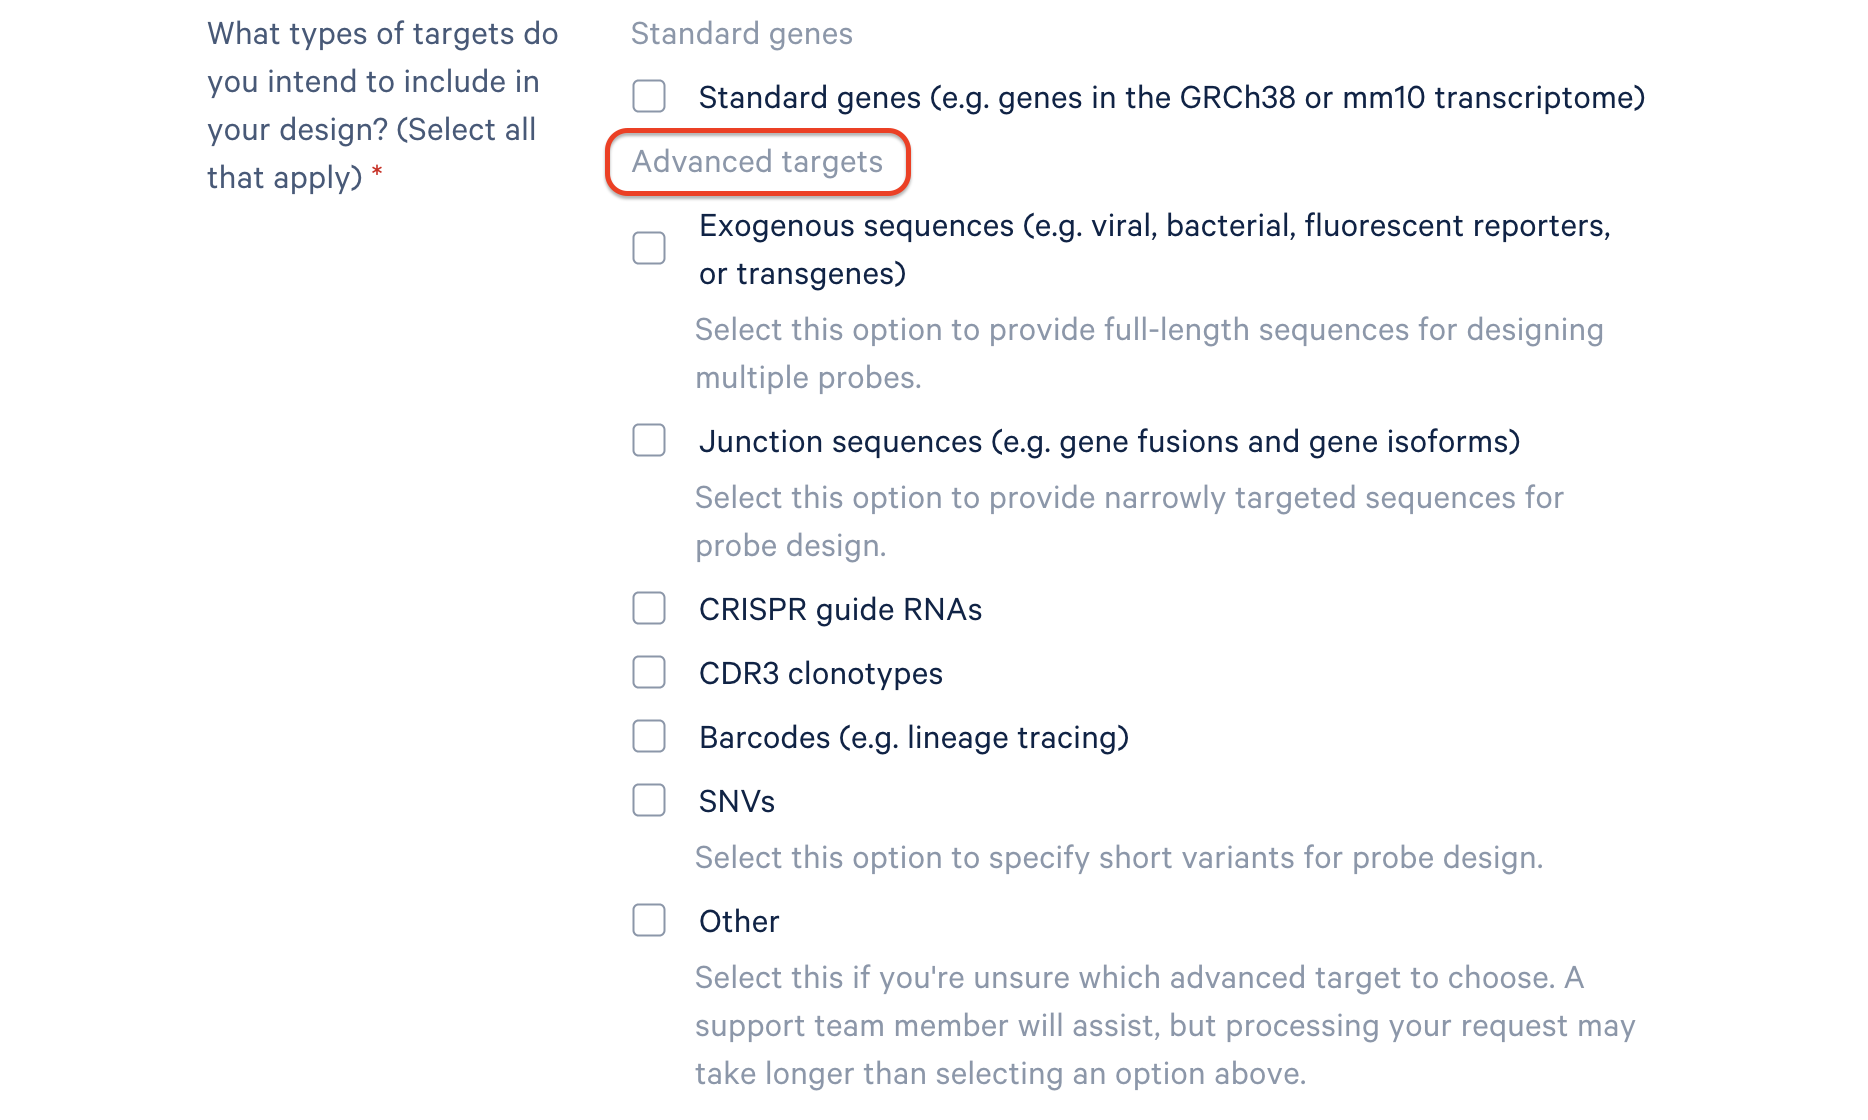
| Advanced workflow | The advanced workflow is prompted by the information circled in red in the screenshots below, which includes having a design ID associated with an Advanced Panel Upgrade from your sales rep, and either selecting "Other" for species and/or selecting advanced target(s). |
After your design ID, chemistry version, organism, and advanced custom selection have been saved, these fields are no longer able to be modified. If you make a mistake, you will need to return to the Xenium Panel Designer homepage, delete this panel design request, and start a new one.
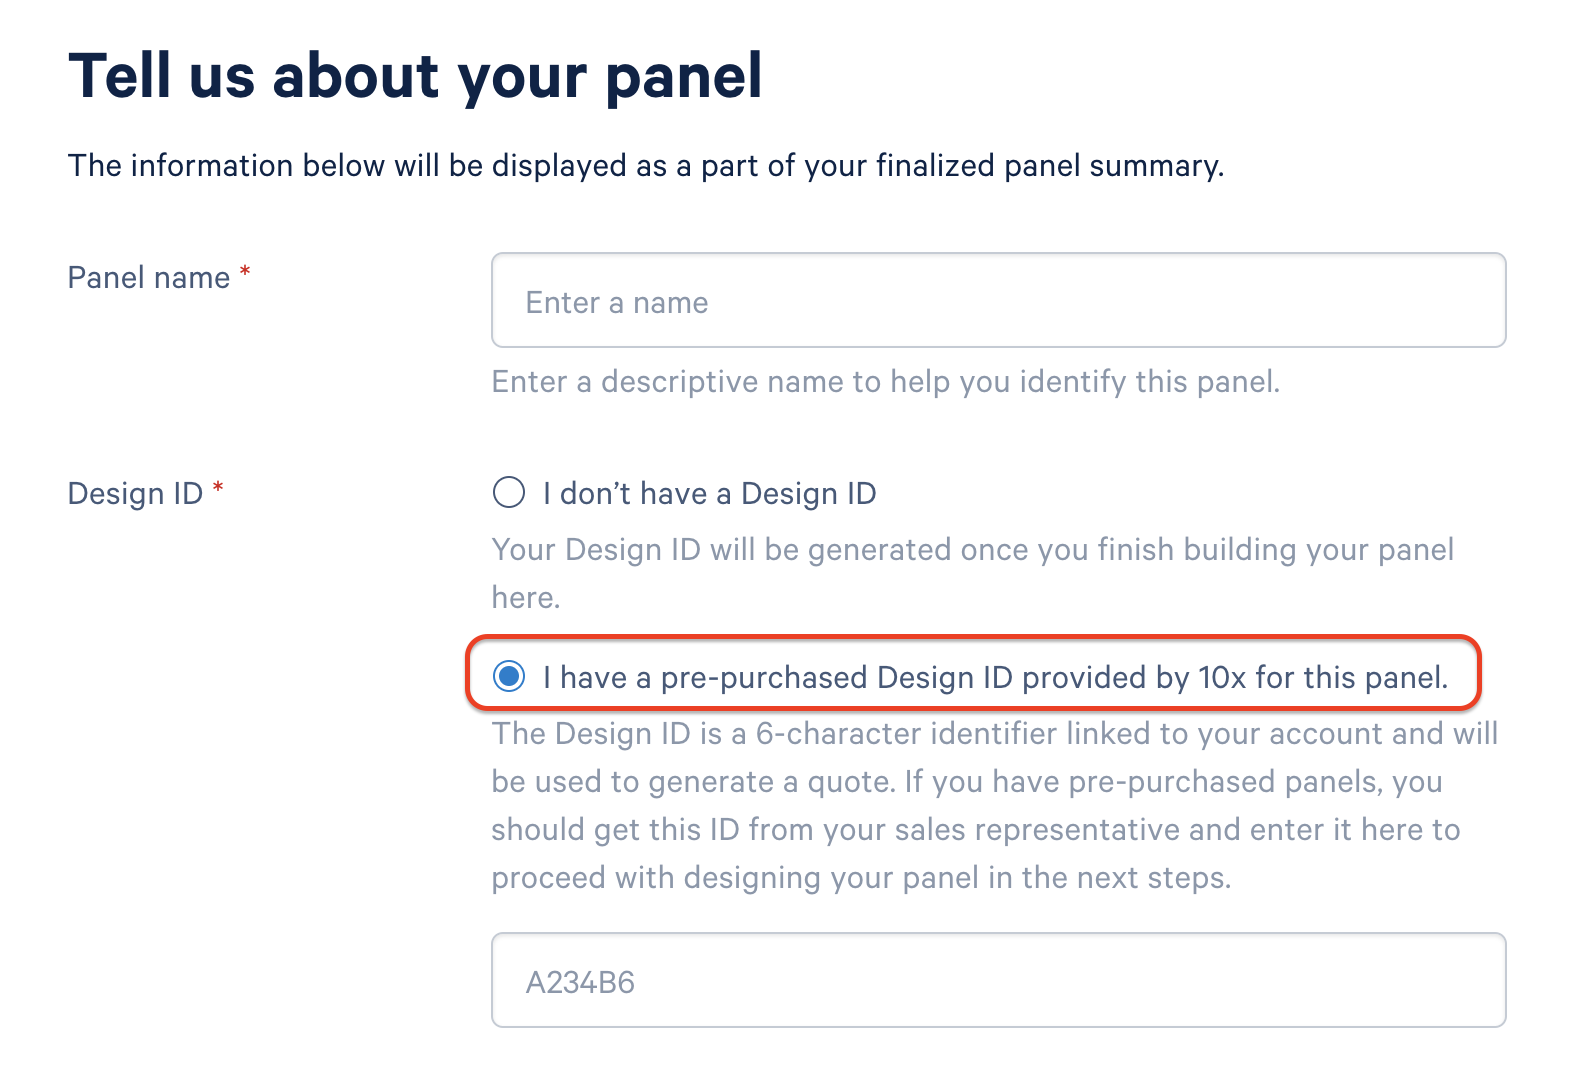
Enter a name for your panel request and select the appropriate design ID option. A design ID (also referred to as a CDP #) is a unique 6-character identifier for each Xenium custom panel design. 10x Genomics generates the design ID and it will be printed on the consumable packaging for your reagents. Additionally, the design ID is in the name of a JSON file that must be loaded onto your instrument when setting up the Xenium Analyzer instrument run that utilizes your custom panel.
| Workflow | Key information |
|---|---|
| Standard workflow | Select either option. If you are generating a human or mouse panel that targets standard genes from the human or mouse transcriptomes, you do not need a design ID to create the custom panel request. At the end of the panel design workflow, a design ID will automatically be generated. Share this design ID with your 10x Genomics sales representative to proceed with ordering your custom panel. |
| Advanced workflow | Select "I have a pre-purchased Design ID provided by 10x for this panel". If you are requesting a species standalone custom panel or if you are planning to include advanced custom targets, you will need a design ID associated with an Advanced Panel Upgrade prior to entering your design request into the Xenium Panel Designer. Contact your 10x Genomics sales representative to discuss your experimental design and request a design ID for your custom panel. Advanced Panel Upgrade part numbers are available here for Xenium v1 and Xenium Prime 5K. |
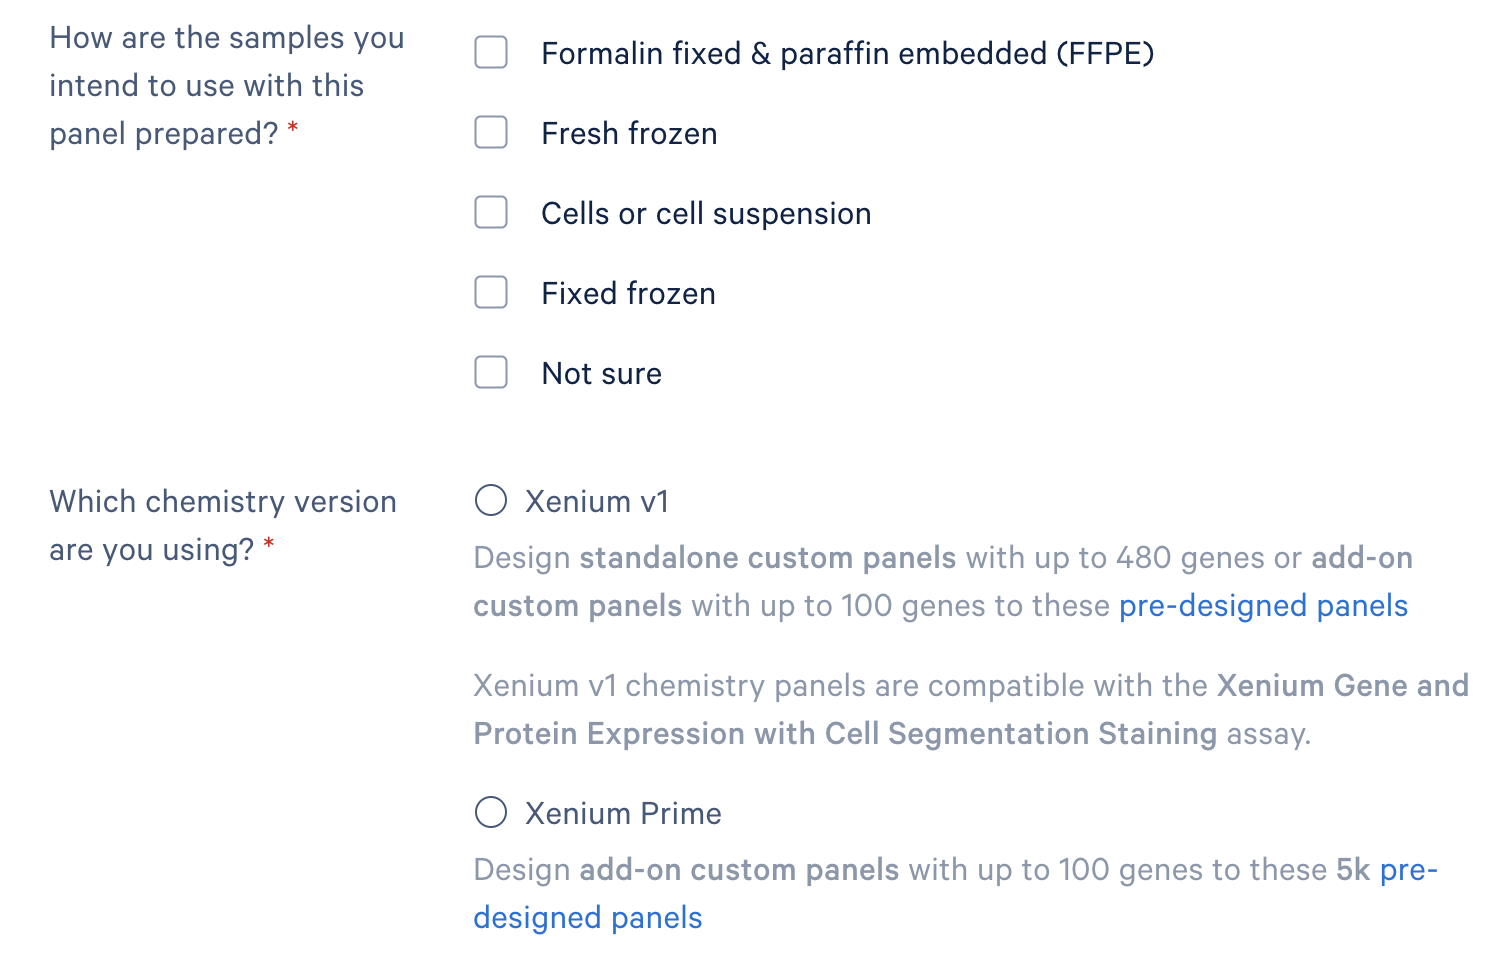
These sections are required for both workflows. The sample preparation method information helps to inform panel design considerations. The Xenium In Situ platform assay chemistry selection determines which custom panel options are available for you to request and informs design considerations.
Learn more on the interpreting Xenium panel design summary page. The plots and utilization thresholds may differ depending on sample preparation and/or assay selection.
| Workflow | Key information |
|---|---|
| Standard workflow | Select "Human" or "Mouse". |
| Advanced workflow | Select "Other" for non-human/non-mouse species standalone requests. To request adding advanced targets (i.e., bacterial or viral genes) to a human or mouse pre-designed panel, select "Human" or "Mouse" in this case. |
| Workflow | Key information |
|---|---|
| Standard workflow | Select "Standard genes (e.g. genes in the GRCh38 or mm10 transcriptome)". |
| Advanced workflow | Select one or more of the "Advanced targets" options. Select "Other" to request targets that are not listed. This will initiate a conversation with our commercial and R&D team to determine if we can support your desired application. To include human or mouse reference genes as well as advanced targets, select "Standard genes". |